ASP.NET Web API
Introduction
A web API is just an application programming interface (API) over the web (that is, HTTP). When the resources of an
application can be manipulated over HTTP using the standard HTTP methods of GET, POST, PUT, and DELETE,
you can say that the application supports a web API for other applications to use. Because HTTP is platform-agnostic,
HTTP services can be consumed by disparate devices across different platforms.
A central concept of HTTP services is the existence of resources that can be identified through a uniform
resource identifier (URI). If you equate resources to nouns, then actions on a resource can be equated to verbs and
are represented by the HTTP methods such as GET, POST, PUT, and DELETE. For an application that deals with the
Users of an organization, each User is a resource the application deals with.
Let us see how an User’s details can be retrieved with an HTTP service. The URI is
http://server<port>/API/Users/1000. It includes the User ID and serves as an identifier to the resource,
which is an User in this case. Actions on this resource are accomplished through the HTTP verbs. To get the
details of an User, you will perform an HTTP GET on the URIhttp://server<port>/API/Users/1000.
To update this User, the request will be an HTTP PUT on the same URI. Similarly, to delete this User, the
request will be an HTTP DELETE request, again on the same URI. To create a new User, the request will be an
HTTP POST to the URI without any identifier (http://server<port>/API/Users).
LET US CREATE WEBAPI
Let us do something practical here. you will create a simple web API that basically exposes an in-memory List<User> over HTTP, for a client application to manipulate the list members. I know this is just limited or small concept but i am sure this will give you clear concept about what webAPI is and how to use it or will give you understanding how to use the ASP.NET Web API framework to build your web API.
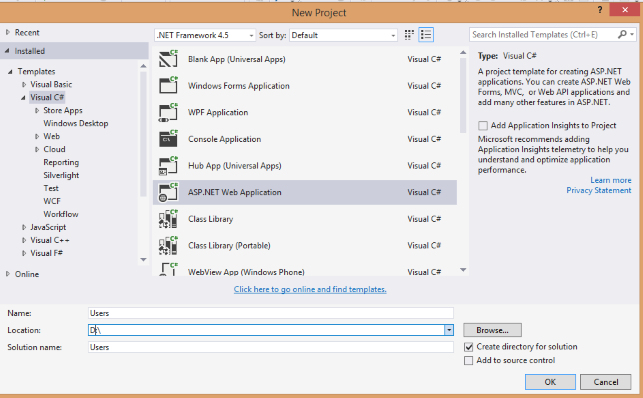
- Run Visual Studio and create a new project like shown below Give the project a
name of Users and click OK, as shown in Figure 1-1.
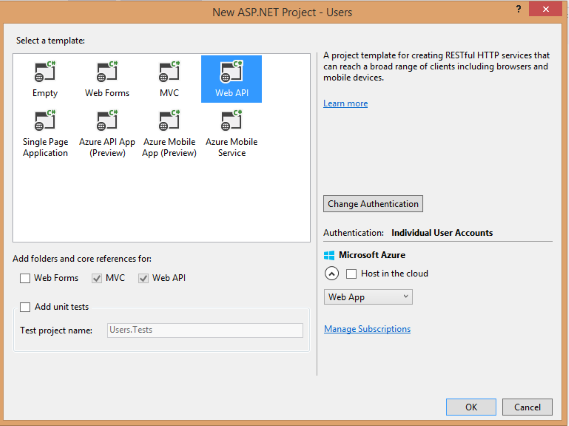
- Select the ASP.NET Web template and click OK. You will see lots of option, as shown in
Figure 1-2.
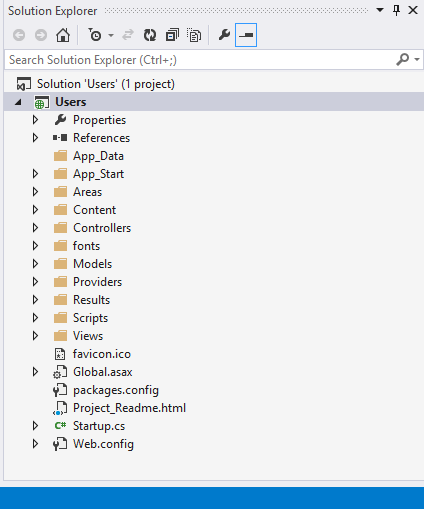
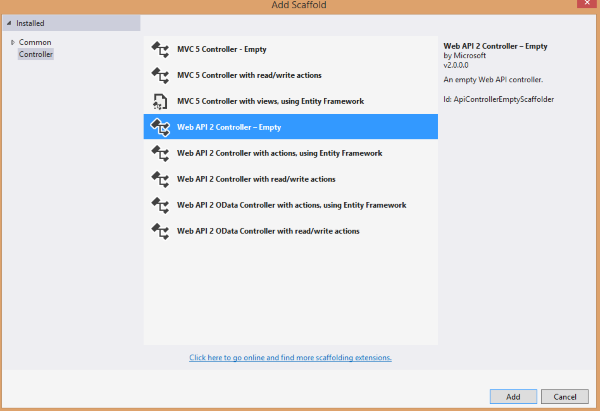
- Choose the Controllers folder in the Solution Explorer of Visual Studio. Select Add ➤ Controller and give a name of UsersController for the controller. Leave the option
Empty API Controller selected in the Template dropdown and click Add, as shown in Figure 1-3. Notice that the generated controller class inherits from ApiController, a class
that is part of the ASP.NET Web API framework.

- Right-click the Models folder in the Solution Explorer of Visual Studio. Select Add ➤ Class to add a new class with a name of User
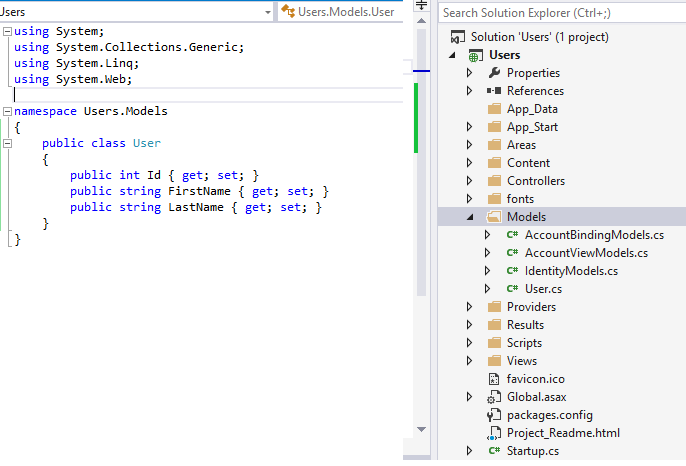
- Add the code shown in Listing 1-3 to the User class.
Listing 1-3. The User Class
public class User { public int Id { get; set; } public string FirstName { get; set; } public string LastName { get; set; } } - Create a new static field at the controller level, as shown in Listing 1-4. This will be the list
that our web API exposes over HTTP.
Figure 1-3. Adding a controller
Listing 1-4. The List of Users
using System;
using System.Collections.Generic;
using System.Linq;
using System.Net;
using System.Net.Http;
using System.Web.Http;
using Users.Models;
namespace Users.Controllers
{
public class UsersController : ApiController
{
private static IList<User> list = new List<User>()
{
new User()
{Id = 1000, FirstName = "Shabir", LastName = "Hakim" },
new User()
{Id = 1001, FirstName = "Raja", LastName = "Public"},
new User()
{Id = 1002, FirstName = "Rani", LastName = "Private"},
new User()
{Id = 1003, FirstName = "Shabir", LastName = "Robert" }
};
// Action Get methods go here
// GET api/Users
public IEnumerable<User> Get()
{return list;}
// GET api/Users/1000
public User Get(int id)
{return list.First(e => e.Id == id);}
}
}
Note: Since you used the User class, which is in a different namespace than HelloWebApi.Models in the
controller class, you will need to add a using directive. In Visual Studio, the User references in the preceding code
will have a wavy underline in red; right-click any of them and select Resolve ➤ using HelloWebApi.Models. This will add
the necessary directive. This is a standard procedure and I will not repeat this step in later exercises, for the sake
of brevity.
- Add five action methods, as shown in Listing 1-5. It is important to use the name as shown
in the listing. You will learn more about why you must follow this naming convention in
the next exercise.
Listing 1-5. The Action Methods to Get, Post, Put, and Delete Users
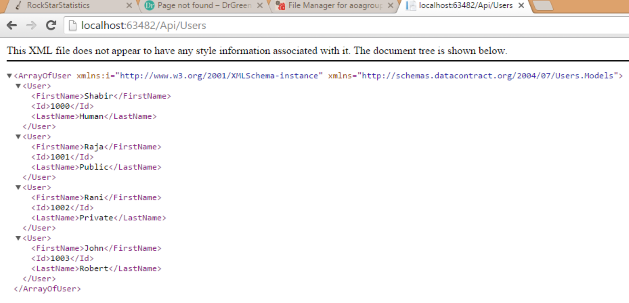
// GET api/Users public IEnumerable<User> Get() { return list; } // GET api/Users/1000 public User Get(int id) { return list.First(e => e.Id == id); } // POST api/Users public void Post(User User) { int maxId = list.Max(e => e.Id); User.Id = maxId + 1; list.Add(User); } // PUT api/Users/1000 public void Put(int id, User User) { int index = list.ToList().FindIndex(e => e.Id == id); list[index] = User; } // DELETE api/Users/1000 public void Delete(int id) { User User = Get(id); list.Remove(User); } - Build the Visual Studio solution and run it by pressing F5. Internet Explorer, which is the default browser associated with Visual Studio, shows the home page with a URL of http://localhost:55778/. (My ASP.NET Web API project uses port 55778. Your project will use a different one and based on that, Internet Explorer will display a different port in the URL.)
- In the address bar type http://localhost:<port>/api/Users Replace <port> with
the actual port your application runs on.
 Note:As you work through the exercises in this book, you will create several new projects, and the port will change
every time you create a new ASP.NET MVC project. Remember to replace the port specified in the example code with your
application’s actual port.
- When Internet Explorer asks if you want to open or save, click Open and choose Notepad as the program to open the file. Notepad will display JSON as shown in Listing 1-6. I have
formatted the output for your reading pleasure.
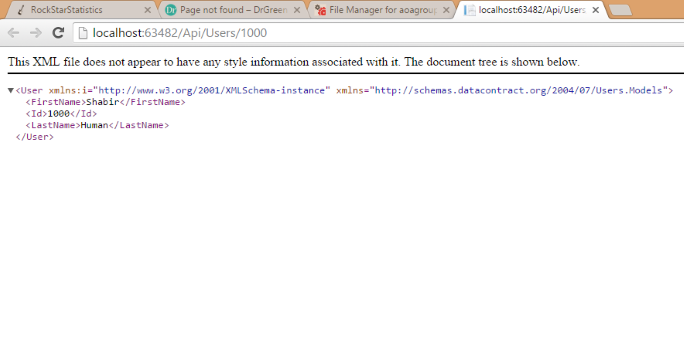
- You can also get the details of a specific User by performing an HTTP GET on http://localhost:63482/Api/Users/1000. In this case, you get the JSON output
shown in Listing 1-7.
- If you see the preceding two JSON outputs, you have just created your first web API and
exposed the in-memory list of Users to the outside world over HTTP!
Currently, we have tested only the HTTP GET but we will test the other methods in the upcoming exercises.
